If you're a ghost hunter extraordinaire in Phasmophobia, you'll be thrilled to discover that the game offers a variety of achievements and trophies designed to challenge your skills. Unlocking all these achievements not only tests your prowess but also earns you the prestigious Achievement Hunter ID Card and Badge for your character. Here's a comprehensive guide on how to unlock all achievements in Phasmophobia.
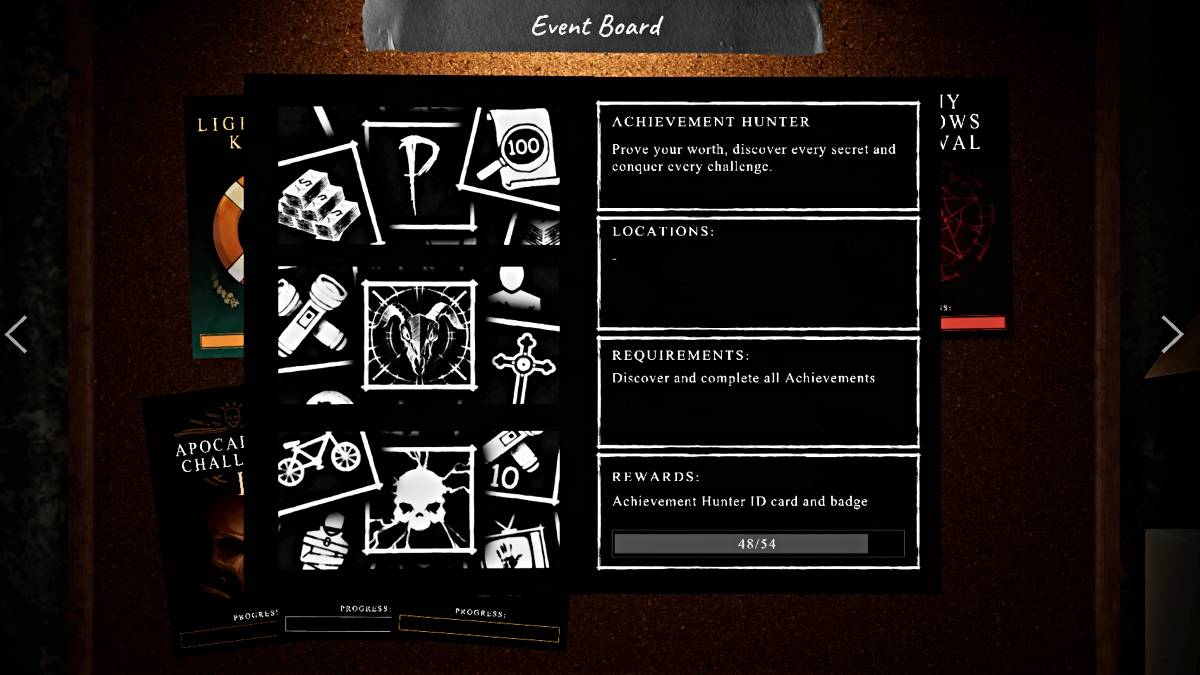
Screenshot by The Escapist
Phasmophobia boasts a total of 54 achievements, with an additional Platinum trophy for PS5 players. These can be unlocked by mastering various aspects of the game, from basic training to the most challenging feats. While some achievements require specific strategies, playing with friends can significantly ease the process. Teaming up allows for faster equipment setup, collaborative ghost identification, and the facilitation of certain ghost behaviors needed for achievements.
Here's a detailed list of all current achievements in Phasmophobia, along with the best tips for unlocking each one:
| Achievement/Trophy | How to Unlock |
|---|---|
| No More Training Wheels | **Complete training** Navigate to the "Training" tab in the Main Menu and follow each step until completion. |
| Rookie | **Complete 10 Contracts** Travel to a chosen map, enter the location, select a ghost from the list, and exit by closing the van. Your guess doesn't need to be correct. |
| Professional | **Complete 50 Contracts** Follow the same steps as for Rookie, but complete 50 contracts. |
| Boss | **Complete 100 Contracts** Follow the same steps as for Rookie, but complete 100 contracts. |
| Extra Mile | **Complete 50 optional objectives** Optional objectives appear when starting a contract. Complete up to three per contract, marked with red checkmarks upon completion. |
| Dedicated | **Complete 30 daily tasks** Find daily tasks in the Main Menu, which refresh every 24 hours. Complete the required activities to fulfill each task. |
| Devoted | **Complete 10 weekly tasks** Weekly tasks are listed in the Main Menu and refresh every 7 days on Sunday. Complete the required activities. |
| Challenger Approaching | **Complete a Weekly Challenge Mode** Access Challenge Mode from the Main Menu, which changes weekly and provides a preset loadout and unique ghost behaviors. Complete the challenge three times within the same week to unlock the achievement and earn $5,000. |
| Rise to the Challenge | **Complete the Weekly Challenge Mode 5 Times** Follow the same steps as for Challenger Approaching, but complete it five times. |
| Taking All Challenges | **Complete the Weekly Challenge Mode 10 Times** Follow the same steps as for Challenger Approaching, but complete it ten times. |
| Chump Change | **Spend $1** After earning money from contracts, spend it on the Equipment Manager screen. |
| Fat Stack | **Spend $10,000** After earning money from contracts, spend it on the Equipment Manager screen. |
| Cash Cow | **Spend $50,000** After earning money from contracts, spend it on the Equipment Manager screen. |
| Break The Bank | **Spend $100,000** After earning money from contracts, spend it on the Equipment Manager screen. |
| Bare Essentials | **Unlock all tier one equipment** As you level up through contract completion, spend money to unlock tier one equipment. This achievement unlocks at Level 16. |
| Tools of the Trade | **Unlock all tier two equipment** Continue leveling up and spending money to upgrade to tier two equipment. This achievement unlocks at Level 49. |
| Fully Loaded | **Unlock all tier three equipment** Reach Level 90 and upgrade all equipment to tier three to unlock this achievement. |
| Director | **Create a custom difficulty** From the Main Menu, navigate to 'Difficulty' under 'Choose a Contract,' select 'Custom,' set your desired features, and apply. The achievement will unlock after applying. |
| Bronze Hunter | **Obtain the Bronze Apocalypse Trophy** Create a custom difficulty for Sunny Meadows Institution in Singleplayer, and complete the following during the contract: all three optional objectives, obtain a ghost photo (1-3 stars), correctly identify the ghost type, and survive the investigation. The default 'Insanity' difficulty can also be used. |
| Silver Hunter | **Obtain the Silver Apocalypse Trophy** Follow the same steps as for Bronze Hunter, but complete the challenge on a higher difficulty level. |
| Gold Hunter | **Obtain the Gold Apocalypse Trophy** Follow the same steps as for Bronze Hunter, but complete the challenge on the highest difficulty level. Completing Gold Apocalypse first will also unlock Bronze and Silver achievements. |
| Banshee Discovered | **Successfully identify your first Banshee and survive** Banshee evidence includes Ultraviolet, Ghost Orbs, and DOTS. They are known for screaming into the Parabolic Microphone, targeting individual players, and singing ghost events. |
| Demon Discovered | **Successfully identify your first Demon and survive** Demon evidence includes Ultraviolet, Ghost Writing, and Freezing Temperatures. They hunt every 20 seconds instead of 25 and at any sanity level. |
| Deogen Discovered | **Successfully identify your first Deogen and survive** Deogen evidence includes Spirit Box, Ghost Writing, and DOTS. They are known for heavy breathing in the Parabolic Microphone. |
| Goryo Discovered | **Successfully identify your first Goryo and survive** Goryo evidence includes EMF5, Ultraviolet, and DOTS. They do not move far from their favorite room during hunts. |
| Hantu Discovered | **Successfully identify your first Hantu and survive** Hantu evidence includes Ultraviolet, Ghost Orbs, and Freezing Temperatures. They move faster in colder temperatures during hunts and cannot turn on the breaker. |
| Jinn Discovered | **Successfully identify your first Jinn and survive** Jinn evidence includes EMF5, Ultraviolet, and Freezing Temperatures. They cannot turn off the breaker and are faster during hunts when it's on. |
| Mare Discovered | **Successfully identify your first Mare and survive** Mare evidence includes Spirit Box, Ghost Orbs, and Ghost Writing. They wander to rooms with the lights off and quickly turn off or blow out lights. |
| Moroi Discovered | **Successfully identify your first Moroi and survive** Moroi evidence includes Spirit Box, Ghost Writing, and Freezing Temperatures. They place a curse on a player when heard through a Spirit Box or Parabolic Microphone, depleting sanity quicker. |
| Myling Discovered | **Successfully identify your first Myling and survive** Myling evidence includes EMF5, Ultraviolet, and Ghost Writing. They are difficult to detect by sound from further away. |
| Obake Discovered | **Successfully identify your first Obake and survive** Obake evidence includes EMF5, Ultraviolet, and Ghost Orbs. They have abnormal ultraviolet prints and change ghost models during hunts. |
| Oni Discovered | **Successfully identify your first Oni and survive** Oni evidence includes EMF5, Freezing Temperatures, and DOTS. They drain extra sanity during ghost events and are more visible during hunts. |
| Onryo Discovered | **Successfully identify your first Onryo and survive** Onryo evidence includes Spirit Box, Ghost Orbs, and Freezing Temperatures. They can be tested by lighting three Firelights in their favorite room, which they will extinguish before triggering a hunt. |
| Phantom Discovered | **Successfully identify your first Phantom and survive** Phantom evidence includes Spirit Box, Ultraviolet, and DOTS. They are not visible in photos taken by the player. |
| Poltergeist Discovered | **Successfully identify your first Poltergeist and survive** Poltergeist evidence includes Spirit Box, Ultraviolet, and Ghost Writing. They throw debris further than other ghosts. |
| Raiju Discovered | **Successfully identify your first Raiju and survive** Raiju evidence includes EMF5, Ghost Orbs, and DOTS. They hunt at higher sanity levels and move faster near electronic equipment. |
| Revenant Discovered | **Successfully identify your first Revenant and survive** Revenant evidence includes Ghost Orbs, Ghost Writing, and Freezing Temperatures. They move slowly during hunts until detecting a player. |
| Shade Discovered | **Successfully identify your first Shade and survive** Shade evidence includes EMF5, Ghost Writing, and Freezing Temperatures. They do not hunt or event if the player is in their favorite room. |
| Spirit Discovered | **Successfully identify your first Spirit and survive** Spirit evidence includes EMF5, Spirit Box, and Ghost Writing. They have a longer cooldown when Incensed. |
| Thaye Discovered | **Successfully identify your first Thaye and survive** Thaye evidence includes Ghost Orbs, Ghost Writing, and DOTS. Their ghost model "ages" as the player's sanity drops. |
| The Mimic Discovered | **Successfully identify your first Mimic and survive** Mimic evidence includes Spirit Box, Ultraviolet, Freezing Temperatures, and Ghost Orbs. They have four pieces of evidence and change ghost behavior. |
| The Twins Discovered | **Successfully identify your first Twins and survive** Twins evidence includes EMF5, Spirit Box, and Freezing Temperatures. They exhibit double ghost activities and hunt at two different speeds. |
| Wraith Discovered | **Successfully identify your first Wraith and survive** Wraith evidence includes EMF5, Spirit Box, and DOTS. They do not interact with any tier of salt placed by the player. |
| Yokai Discovered | **Successfully identify your first Yokai and survive** Yokai evidence includes Spirit Box, Ghost Orbs, and DOTS. They have stronger player audio detection and can hunt at up to 80% sanity when the player is in their room. |
| Yurei Discovered | **Successfully identify your first Yurei and survive** Yurei evidence includes Ghost Orbs, Freezing Temperatures, and DOTS. They frequently interact with doors and can close the entrance door outside of hunts and events. |
| I | **Reach Prestige I** Upon reaching Level 100, you'll be offered the chance to 'Prestige' via the Main Menu. Accepting this will unlock the achievement, but note that your level and equipment will reset. |
| II | **Reach Prestige II** Follow the same steps as for Prestige I, but reach Level 100 again after resetting. |
| III | **Reach Prestige III** Follow the same steps as for Prestige I, but reach Level 100 again after resetting a second time. |
| Work Experience (Hidden) | **Complete your first contract** In either Singleplayer or Multiplayer, complete a contract by selecting a ghost from the list in your Journal and exiting the map by closing the van, not by selecting 'Leave Game' in the Journal. |
| Flawless Execution (Hidden) | **Complete a perfect investigation** During a contract, complete all three optional objectives, take nine 3-star photos, collect the bone from the map, and correctly guess the ghost's identity. |
| They're Here (Hidden) | **Witness a Poltergeist ability** Poltergeists can throw multiple objects simultaneously if grouped together. Gather various items and place them in a pile in the ghost's location to trigger this ability. |
| Escape Artist (Hidden) | **Escape a Revenant** Successfully escape a Revenant during a hunt, ideally using tier 2 or 3 Incense to stall the ghost while you escape. |
| The Bait (Hidden) | **Get killed by a Banshee in multiplayer** In a group, identify a Banshee, lower your sanity, and wait in the ghost's location for a hunt to trigger. |
| Doom Slayed (Hidden) | **Get killed by a Demon ability within the first minute** Demons can hunt at any sanity level, so this achievement is largely a matter of luck, requiring you to be hunted as soon as you enter the map. |
| Paranormal Perfectionist (PS5 Platinum Trophy) | Obtain all trophies |
That wraps up the guide on unlocking all achievements in Phasmophobia. For more insights and the latest updates, be sure to check out The Escapist for additional guides and news on the game, including the Phasmophobia No Evidence Cheat Sheet.
Phasmophobia is available now on PlayStation, Xbox, and PC.